How to install Snort and use as Web Application Firewall!
Considering a number of attacks on web application these days, one must be pro-active in case of the security. You might already be using Web Application Firewall for your web application security including but not limited to ModSecurity. However, ModSecurity works at the application layer.
That means it is installed with Web Server Software (Apache, Nginx etc). Any malicious packets that travel towards your web application are then blocked by this firewall on the application layer. Packet first arrives on the interface of a server, then it moves to the Linux kernel and eventually, it arrives at the application (here application is a web server). ModSecurity is installed as a module in a web server, which inspects every packet before it is delivered to the web application.
Now, would it be better to inspect these packets as soon as they arrive on your network interface cards? Before they even reach your web server? Yes, it would be better and it can be achieved via Snort. Snort is an intrusion detection system and it looks into all the packets that come on your network interface card. In this article, we will see that how to install snort and use as web application firewall. (Even though it can be used to prevent against many more attacks).
Step 1: Download Ubuntu and Prepare Environment for Snort Installation
I’ve performed the installation of Snort on Ubuntu 16.04 server version without a single glitch. You can download the exact Ubuntu version that I’ve used from here. Once the download is complete you need to create a virtual machine on either VMware or Oracle Virtual box. Or you can look at vps offers to buy a vps to test snort, but make sure you get Ubuntu 16.04 server version installed on your VPS. Once you have a virtual machine ready with Ubuntu installed we are ready to prepare our environment for Snort installation by installing pre-requisites.
We first need to bring all our system packages to their latest version along with the kernel, we can simply use these commands to do that:
sudo apt-get update
sudo apt-get upgrade
sudo apt-get dist-upgrade -y

# than install openssh server to access your virtual machine via ssh


sudo apt-get install -y openssh-server
sudo reboot
Snort has 4 most important dependencies:
- pcap (libpcap-dev)
- PCRE (libpcre3-dev)
- Libdnet (libdumbnet-dev)
- DAQ
Except for DAQ everything is available in default Ubuntu repository, we will install daq from the source directly. Commands below will install everything that we require:
sudo apt-get install -y build-essential

sudo apt-get install -y libpcap-dev libpcre3-dev libdumbnet-dev
Following software is required by daq:
sudo apt-get install -y bison flex
Now install daq:
wget https://snort.org/downloads/snort/daq-2.0.6.tar.gz
tar -xvzf daq-2.0.6.tar.gz
cd daq-2.0.6
./configure
make
sudo make install
There are some libraries, they are not mandatory but it can improve snort performance, they can be installed using:
sudo apt-get install -y zlib1g-dev liblzma-dev openssl libssl-dev

sudo apt-get install -y libnghttp2-dev
That is all we’ve successfully installed all pre-requisites. You can now easily install snort.
Step 2: Configure Network Adaptor
We’ve to disable two settings for your network adaptor for snort to work properly:
- Large Receive Offload
- Generic Receive Offload
You can do that via pasting following two lines on your network interface file: ( /etc/network/interfaces )
post-up ethtool -K ens33 gro off
post-up ethtool -K ens33 lro off
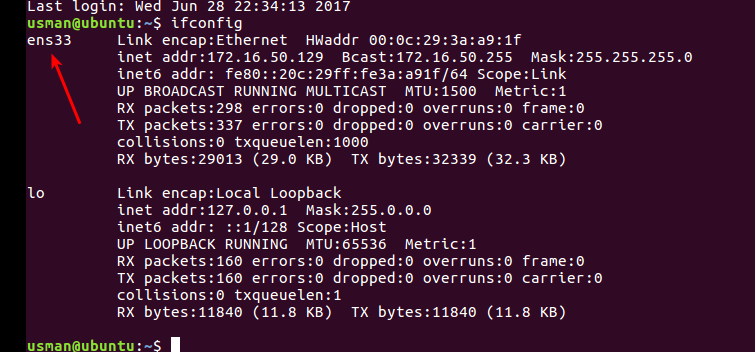
Note: “ens33” is the name of the interface on my vps, to get the name of the interface on your machine you can use “ifconfig” command, the output will be something like this:
Your network interface file will finally look like:
# This file describes the network interfaces available on your system
# and how to activate them. For more information, see interfaces(5).

source /etc/network/interfaces.d/*

# The loopback network interface
auto lo
iface lo inet loopback

# The primary network interface
auto ens33
iface ens33 inet dhcp
post-up ethtool -K ens33 gro off
post-up ethtool -K ens33 lro off
Now restart your network.
Step 3: Install Snort!
After installing all the dependencies and configuring your interface you are now ready to install snort from source.
wget https://snort.org/downloads/snort/snort-2.9.9.0.tar.gz
tar -xvzf snort-2.9.9.0.tar.gz
cd snort-2.9.9.0
./configure --enable-sourcefire
make
sudo make install
If nothing fails, snort is now successfully installed. But we’ve to do a lot more.
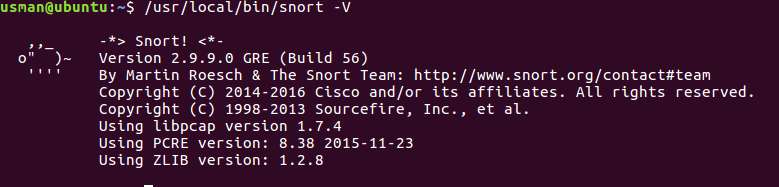
You can now test snort installation using:
/usr/local/bin/snort -V
Your output should something like this:
Step 4: Configure Snort!
Snort is installed, but just like any other software in Linux, it depends on a lot of configuration files, in this step we will create configuration files needed by a snort and set proper permissions so that snort can access those files.
We will start by creating a user “snort” under which Snort will run than create files required by a snort and change the owner of those files to “snort” user.
Let us start by creating a user and group snort:
sudo groupadd snort
sudo useradd snort -r -s /sbin/nologin -c SNORT_IDS -g snort
We will now create some directories, these directories will contain snort configuration and other important related files:
sudo mkdir /etc/snort
sudo mkdir /etc/snort/rules
sudo mkdir /etc/snort/rules/iplists
sudo mkdir /etc/snort/preproc_rules
sudo mkdir /usr/local/lib/snort_dynamicrules
sudo mkdir /etc/snort/so_rules
Create files that will save rules:
sudo touch /etc/snort/rules/iplists/black_list.rules
sudo touch /etc/snort/rules/iplists/white_list.rules
sudo touch /etc/snort/rules/local.rules
sudo touch /etc/snort/sid-msg.map
Create directories where snort will store logs, you can create them on location which suits you best:
sudo mkdir /var/log/snort
sudo mkdir /var/log/snort/archived_logs
Let’s change the permissions now:
sudo chmod -R 5775 /etc/snort
sudo chmod -R 5775 /var/log/snort
sudo chmod -R 5775 /var/log/snort/archived_logs
sudo chmod -R 5775 /etc/snort/so_rules
sudo chmod -R 5775 /usr/local/lib/snort_dynamicrules
We now need to make snort the owner of the directories we created above:
sudo chown -R snort:snort /etc/snort
sudo chown -R snort:snort /var/log/snort
sudo chown -R snort:snort /usr/local/lib/snort_dynamicrules
Snort depends upon a lot of configurations files, some of these configuration files can be taken directly from the Snort tarball that you have downloaded. We can use the commands below to copy these files to their respective locations:
Note: I am assuming you are in a directory where you have extracted Snort tarball.
cd snort-2.9.9.0/etc/
sudo cp *.conf* /etc/snort
sudo cp *.map /etc/snort
sudo cp *.dtd /etc/snort
cd snort-2.9.9.0/src/dynamic-preprocessors/build/usr/local/lib/snort_dynamicpreprocessor/
sudo cp * /usr/local/lib/snort_dynamicpreprocessor/
We now have everything ready, all we need to do now is configure our configuration files and start snort so that we can inspect our network traffic.
Step 5: Define Rules!
Before we start Snort, we have to define rules, for now, we will comment out all the rules that come by default with snort, so that we can do our own manual test. You can comment out all the current rules using:
sudo sed -i "s/include \$RULE\_PATH/#include \$RULE\_PATH/" /etc/snort/snort.conf
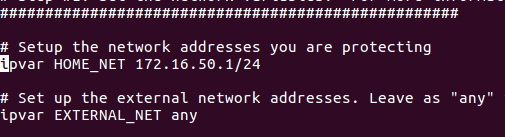
We will now make some changes in “/etc/snort/snort.conf”
On line 45 of this file you will have something like this: “ipvar HOME_NET any”
Note: “nano +45 /etc/snort/snort.conf” , command within quotes will take you directly to 45th line on this file.
You can remove any with your network configuration, and example of it will be:
ipvar HOME_NET 172.16.51.1/24
var RULE_PATH /etc/snort/rules
var SO_RULE_PATH /etc/snort/so_rules
var PREPROC_RULE_PATH /etc/snort/preproc_rules
var WHITE_LIST_PATH /etc/snort/rules/iplists
var BLACK_LIST_PATH /etc/snort/rules/iplists
We will create a special file where we are going to define custom rules so that we can test the successful installation of Snort, for that you need to uncomment a line on 546.
After uncommenting the line it should look like:
include $RULE_PATH/local.rules
sudo /usr/local/bin/snort -T -i ens33 -c /etc/snort/snort.conf
It must say following at the end: Snort successfully validated the configuration!
Step 6: Test the working of Snort!
alert icmp any any -> any any (msg:"ICMP Packet"; sid:477;rev:3;)
Let see what does this rule means:
Rule Action: alert
This means what to do when this rule is triggered, it is set to alert only and do no other action.
Protocol: icmp
The rule implies to icmp packets on the interface card.
Source IP and Source port:
Next, we define that this rule should trigger for any IP address and for any port.
Arrow:
Determine the direction of the packet.
Destination IP and Destination Port:
They are also set to any
Last Option (In brackets):
Is the message which will be displayed when this rule is triggered, as seen in the image below:

Start Snort
Once you have defined the rule and you know what each option in the rule meant, it is the time we should start Snort to listen on the interface and trigger alerts if there are any rules matched, you can start snort using:
sudo /usr/local/bin/snort -A console -q -u snort -g snort -c /etc/snort/snort.conf -i ens33
Note: Please replace “ens33” with your interface name.
Once you run this command, there will be no output yet. But snort is started, it will start printing output once any rule is triggered.
Now go to another machine in the network and ping your snort virtual machine, and you will see something like this:
If this is what you see, that means Snort is successfully installed and configured. If not please go back and see what you have missed and make sure everything is in the correct order.
Step 7: Install Web Server!
This article was about protecting web server using Snort, now that Snort is installed and configured we will install our web server and define some rules that can protect against web application attacks. Apache can be installed using:
sudo apt-get install apache2
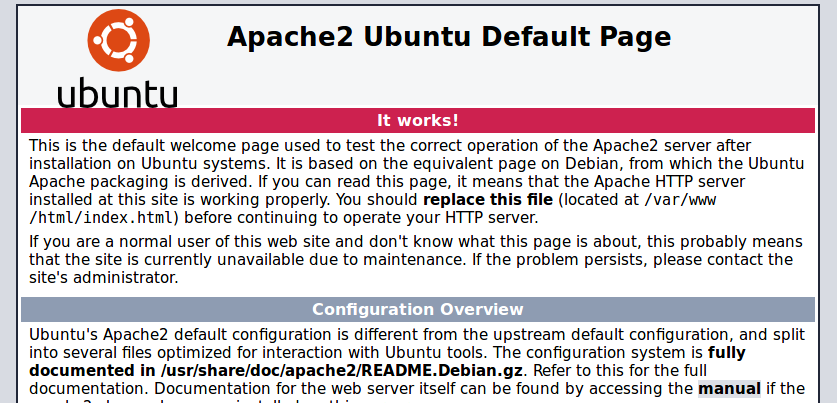
Make sure that installation is successfully by pointing your browser to http://< IP Address >
It should load apache default page, something like this:
Step 8: Define rules to block Malicious web traffic
We will first define a simple rule which will generate alerts for all the HTTP packets:
alert tcp any any -> any 80 (msg:"HTTP Packet"; sid:478;rev:3;)
This rule simply says that if any packet whose protocol is “TCP” and its destination port is “80“, the trigger should be raised. (Normally web server runs on port 80)
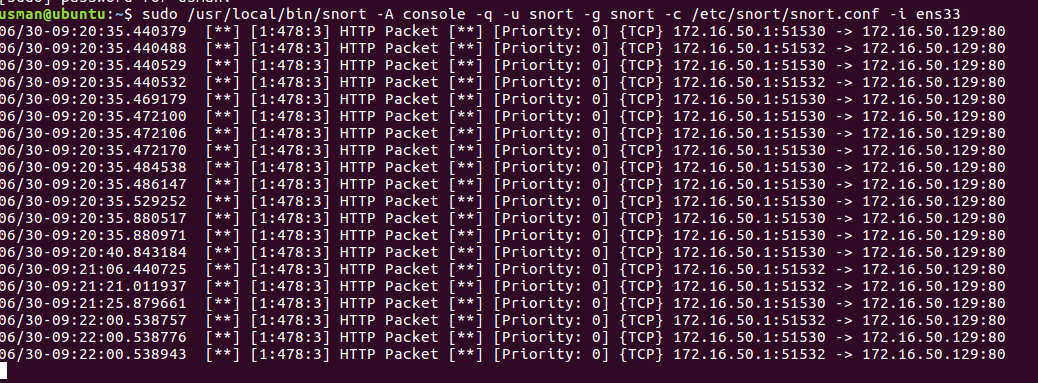
Now start Snort and again open your IP on the browser at http://< IP Address >
You would see some alerts like this generated where Snort is running:
However this is the very general rule and this won’t tell us anything, we will have to define rules that will protect us against real attacks:
alert tcp any any -> any 80 (msg:"XSS Attack"; sid:479;rev:3;content:"alert(1)")
This is another simple rule, that does the same thing as the last one, but it will only generate alerts if a packet contains following content inside it “alert(1)”, which is a general test of XSS attack on a web application. After adding this rule to the file, visit the following link:
http://< IP Address>/?=alert(1)
You will see something like this:

However, you do not need to worry about generating rules, because there are millions of attack signatures. You can use rules that are already defined by experts. You can download and paste those rules in the file.
Conclusion
In this article we learned how to install snort, and how can we use Snort to protect against web application attacks. And why it is beneficial to stop web attacks at interface level rather than on application level.
Because it is much better to stop the attack before it even reaches the application, this reduces the chance of your web server getting compromised.
If you have any question or queries feel free to ask in the comment box below.
Nice article but my criticism is you show how to generate alerts using Snort but not how to block the possible attacks based on the alerts generated.. unless I missed something – so this is not really a description of how to use snort as a WAF more just snort as an IDS for web. How you gonna drop traffic that is flagged as malicious?