How to install missing PHP Extensions in cPanel/WHM
PHP is one of the most used server side programming language. Mostly PHP becomes the reason for a website to become slow, for that reason PHP is a modular language and all the PHP modules/extensions are not installed by default so that it can be as light weight as possible. Now different kind of applications have their own customized needs that are not included in default PHP installation, so you need to install those missing php extensions for your application to behave normally. In this article we will see how to install missing PHP extensions in cPanel/WHM.
Most web hosting companies or even individual uses cPanel/WHM to control their web server behavior and for ease of use, but cPanel does not install all the extension that may be required to run a PHP application.
Step 1: Login to your WHM
First step in the installation of your mission PHP extension is to log into WHM and find the place where you can install those missing extensions. Your WHM login url would look something like:
https://<IP Address>:2087
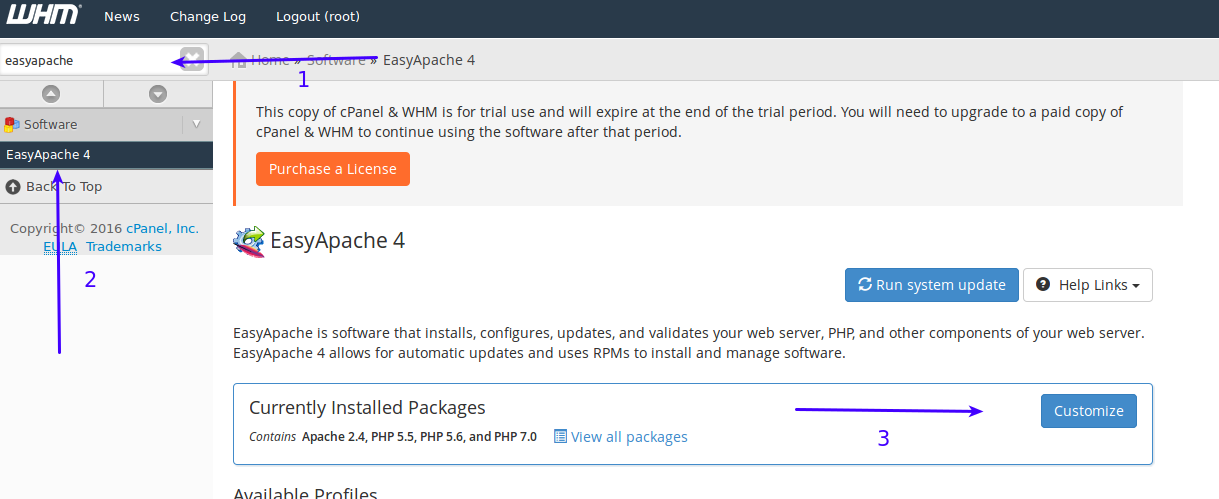
- In the search bar enter ‘easy apache’.
- Click the ‘Easy Apache 4’ or ‘Easy Apache 3’, depending on your WHM version.
- Currently installed Packages tells you that what is your current server setup, on the right you can click ‘Customize’ to install or remove packages as needed.
After you click ‘Customize’ it will than take sometime to load the packages.
Step 2 : Select PHP Extensions
Easy apache does not only allow you to install PHP extensions, you can install:
- Apache Modules.
- Differenct PHP Versions.
- PHP Extensions
Please note that latest cPanel/WHM comes with 3 flavours of PHP, that includes:
- PHP 5.5
- PHP 5.6
- PHP 7.0
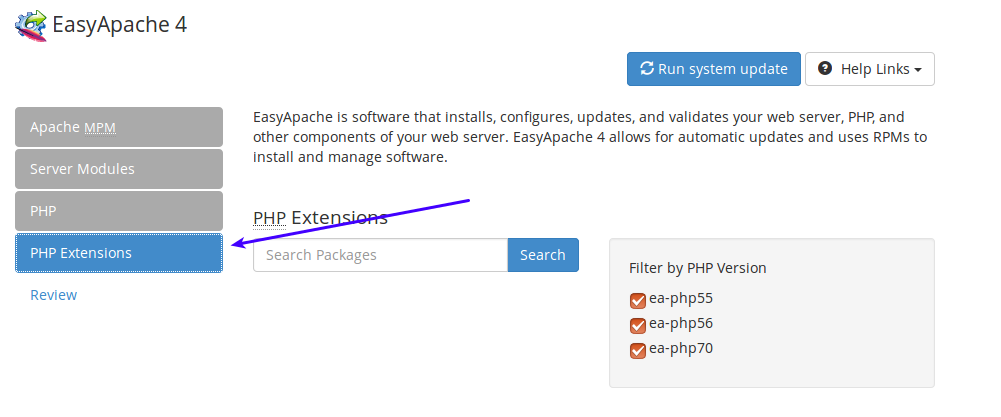
By default all applications run on PHP 5.6, so you have to install the extension for PHP 5.6 unless you have told WHM to use another PHP version for your cPanel account. So from the menu first select ‘PHP Extensions’ as selected in the image below:
Step 3: Search and select the appropriate php version
You can now use the ‘Search Packages’ box to search the packages, in this tutorial we are going to install the extension named ‘iconv’, this extension is not bundled with default PHP installation. So if you need this extension you have to follow this guide 🙂
Just put ‘iconv’ in the search box. Your search results would look something like this:
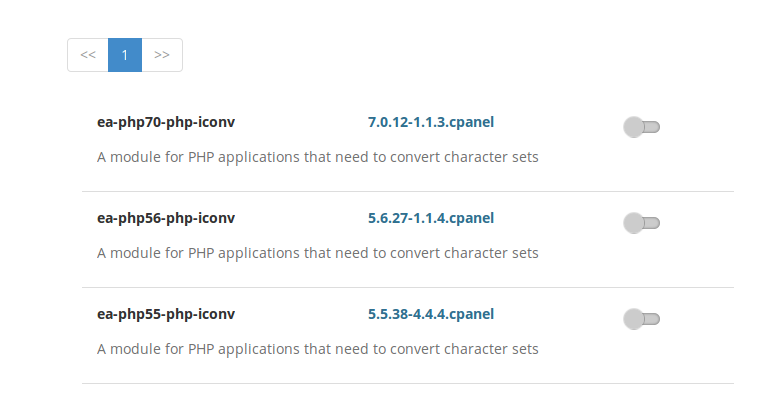
As you can see that it gave you 3 options, now by default all cPanel accounts use PHP 5.6, so you have to turn on the second selection only. Or if you have different applications using different versions of PHP than turn all of them on and click ‘Next’ on the bottom of the window. I am going to install it only for PHP 5.6.
Step 4: Provision your custom build
After your step 3 is done successfully than it will take some time to prepare your package installation and let you know what will be installed and un-installed by this new extension that you are going to install. It may also tell you that which modules are affected by the installation of this new module. The window might look something like this:

If everything looks fine, you are ready to provision, on the bottom of this window you can click ‘Provision’ and your mission extension is now installed in our case its iconv. You will now be successfully able to use the functions defined by this extensions.
Hi bro!
Can I get in online any other easy using PHP compiler without Adobe DreamWeaver?
I don’t feel comfort in DreamWeaver at the time of coding. Will you please answer me?
Thank you
Sadhan Pal
If you don’t like dream viewer for php application development, you can try https://www.jetbrains.com/phpstorm/
Thank you
Thanks a lot. This worked on my VPS
Hi,
Actually, I am doing the same but after review, my provision is not working.
“There are no changes needed to provision based on the profile of your selection”.
Please help
Thank you
I found this very helpful, I have added php extension easily.
Many Thanks!