How to install OpenStack and Create your First Virtual Machine/Instance!
OpenStack is basically a cloud operating system. That let you deploy public and private clouds and take care of all the things for you. In this article, we will see that how to install OpenStack and create your first virtual machine or in other words launch your first instance.
We will perform our installation on Ubuntu 16.04 Server flavor because as mentioned on OpenStack site, they have done extensive testing with this flavor and this operating system is best suited for OpenStack. You can download the exact version that I’ve used from here. You can download Oracle virtual box and do everything inside your computer, or look at the VPS offers section to find a best VPS provider to test OpenStack, I would recommend buying a VPS. Minimum requirements for OpenStack is listed below:
- 4 GB Of Ram.
- 4 CPU Units.
- 30 GB Disk Space.
Once you have a virtual machine installed with mentioned version of Ubuntu, you are ready to install OpenStack and take it for a spin.
Step 1: Prepare the environment for installing OpenStack!
There are few things that need to be done before we start installing OpenStack. Just please run the following commands and you will be done with it:
sudo apt-get update
sudo apt-get upgrade


sudo apt-get dist-upgrade


sudo apt-get install git -y


sudo reboot
These commands will just bring all your packages to the latest version and install git so that we can clone OpenStack to our Linux machine.
Step 2: Download and Install OpenStack!
Note: If you already have a “stack” user on your virtual machine or laptop (with sudo privileges), then you do not need to create an additional user.
After your virtual machine is done with a reboot, you are now ready to install OpenStack. Normally OpenStack runs under non-root user with sudo privileges. We can easily create one to start with using:
sudo useradd -s /bin/bash -d /opt/stack -m stack
We’ve just created a user “stack” on our Linux machine, now let us give this user sudo privileges using:
echo "stack ALL=(ALL) NOPASSWD: ALL" | sudo tee /etc/sudoers.d/stack
This will give the stack user sudo privileges. We now have to log in as user “stack” to proceed with our installation, that can be done using the command:
sudo su - stack
Now you are logged in as user “stack”, let’s start with the installation of OpenStack by downloading the required material.
git clone https://git.openstack.org/openstack-dev/devstack

# cd to the cloned directory

cd devstack
Normally during installing it will ask you to set various passwords, you can automate this process by creating a file in your current directory named “local.conf”.
# create the file

nano local.conf

# Now paste following contents in the file

[[local|localrc]]
ADMIN_PASSWORD=secret
DATABASE_PASSWORD=$ADMIN_PASSWORD
RABBIT_PASSWORD=$ADMIN_PASSWORD
SERVICE_PASSWORD=$ADMIN_PASSWORD
Save and exit the file, this will automate the installation process. We are now ready to run the installation script. Installation script can be launched using the command:
./stack.sh
Depending on your hardware and internet connection installation can take from 10-20 minutes, once installation is complete you will have something like this on your console (at the end of the installation):
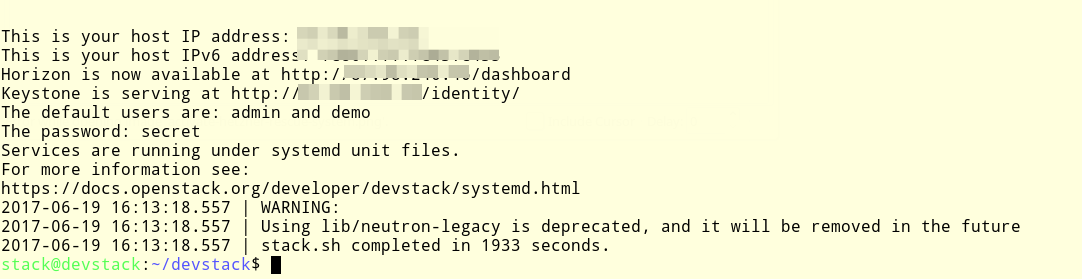
OpenStack dashboard can now be accessed at : http://<IPAddress>/dashboard/
We will now see that how we can launch our very first and basic instance inside the cloud we just created.
Step 3: Create Network!
Note: Please remember that without having a network, you can not launch an instance/virtual machine.
After you are logged into the OpenStack Dashboard it will look something like this:

Before we launch our first virtual machine, we need to create a network that virtual machine can use. For now, it will just be a dummy network, because our main purpose in this article is to launch our first virtual machine or instance. Let see how we can create a network inside OpenStack.
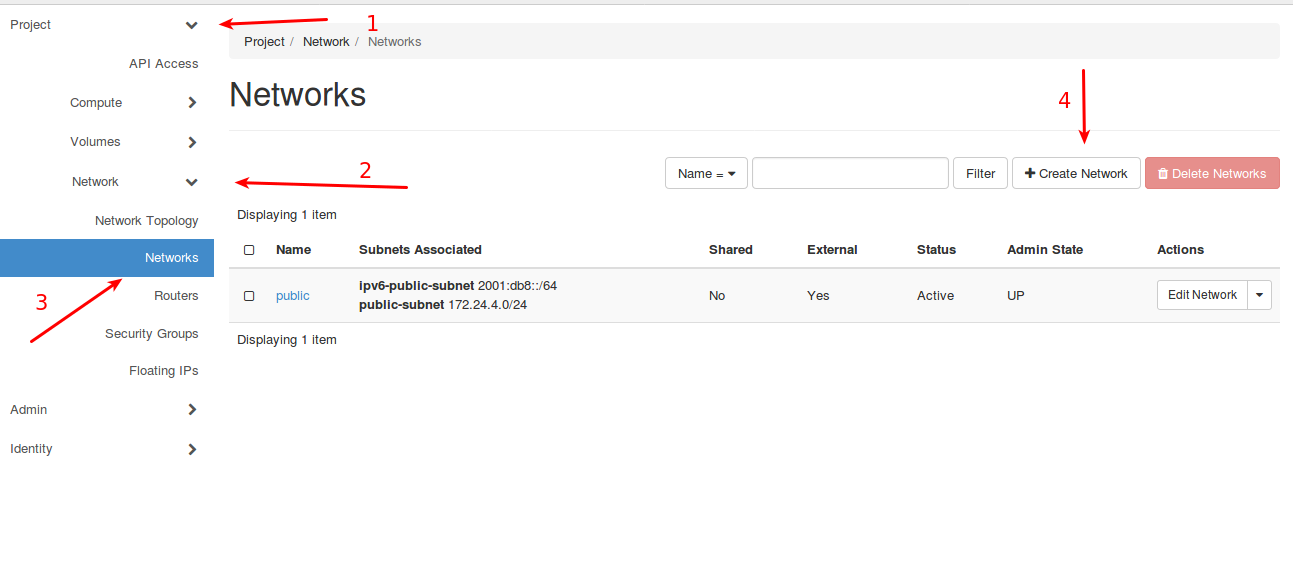
- Click the Project Drop Down.
- Click the Network Drop Down.
- From network Drop Down select Networks, and this window will open that you see on the right side.
- Finally, click Create Network.
Something like this will pop-up:

Give your network a name and click Next, I’ve given it a name “CyberPersons”.
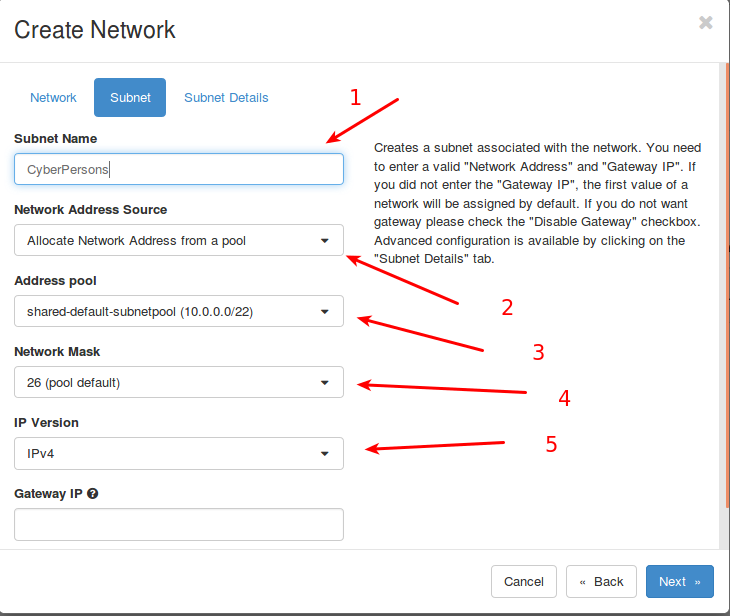
Now on this window, you have to create a subnet, your settings should look like as they are in the image above. Except for the “Subnet Name” box all of these are drop downs and you can choose from the given options.
- First, give your subnet a suitable name.
- “Network Address Source” is a dropdown, it has two available options. You can select the second as chosen in the image above.
- “Address pool” also have two possible option, select the first option.
- “Network Mask” have many options in the drop down, you can keep the default which is 26.
- IP version should be IPv4.
Once all these things are done, click “Next”.
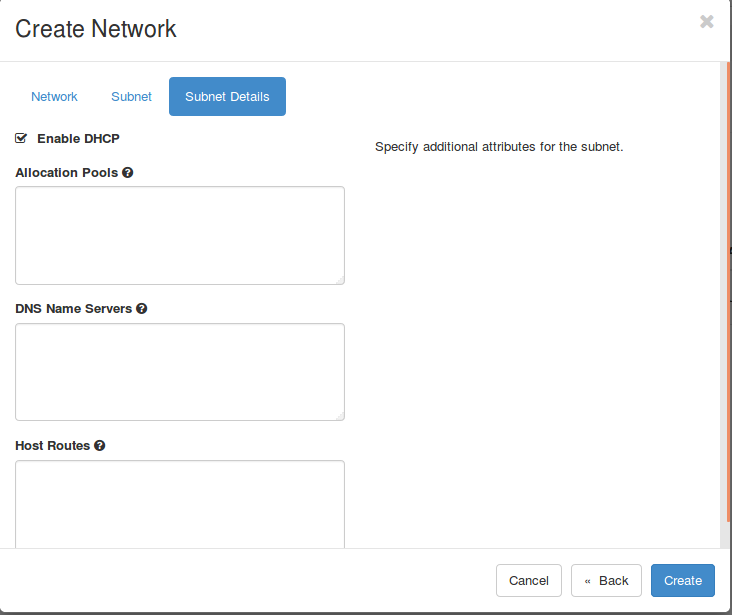
Now everything is optional in this window if you are interested in filling something up, you can. Otherwise, leave everything as it is and click “Create”. You now have a network that you can use to launch a virtual machine.
Step 4: Create Virtual Machine/Instance
After the network is created, we are now ready to create our very first virtual machine.
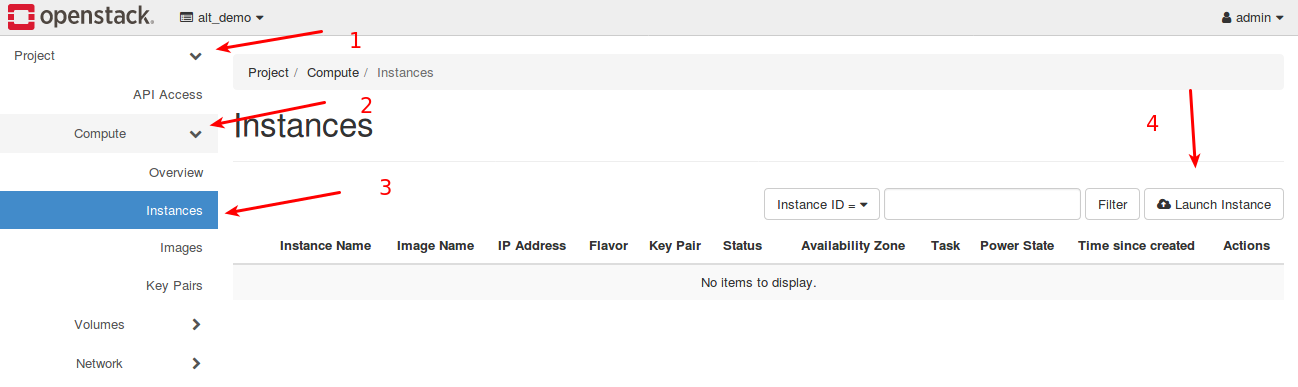
- Click on “Project” drop down.
- Inside project click “Compute” drop down.
- Under compute you have four options, since we are interested in creating an instance, you have to click on “Instance”.
- Finally, click “Lunch Instance”.
Something like this will pop-up.
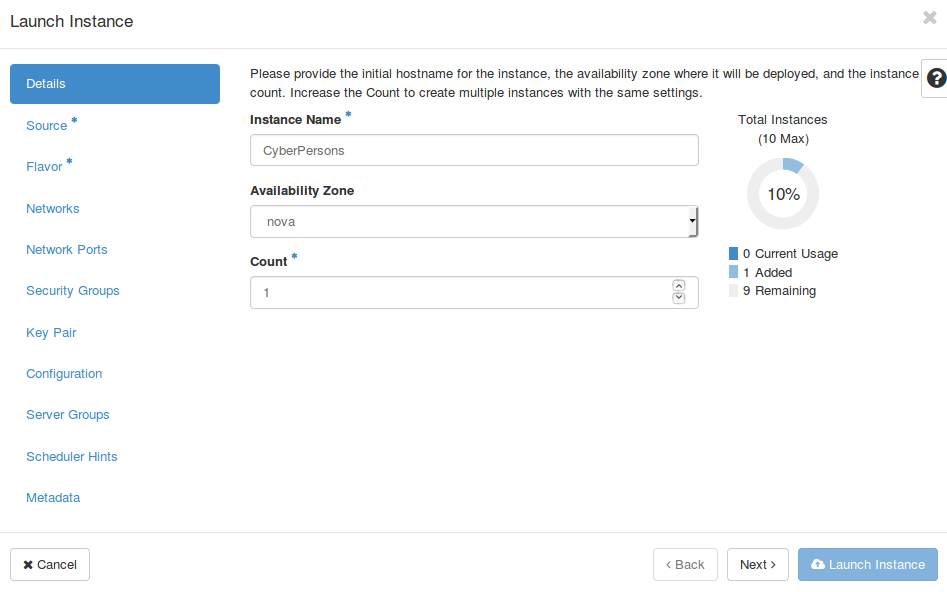
Now, there are 11 tabs to create an instance, we will go through each tab one by one.
Details Tab
This is a general information tab for creating an instance, you will have to assign a name to your virtual machine on this tab. Select zone to launch a virtual machine, and tell how many copies of virtual machine you want. Just make sure your settings look like this:
Source Tab
Normally when we create a virtual machine on Proxmox or VMWare we need to insert CD-ROM (virtual CD room), that VPS uses to install the operating system.
In OpenStack this is done by Source Tab, you can use various ways to launch a new virtual machine, OpenStack allows you to choose following as a source to create your instance.
- Image
- Snapshot of already created instance
- Volume or a volume Snapshot
We are going to use “Cirros” image to create our instance.
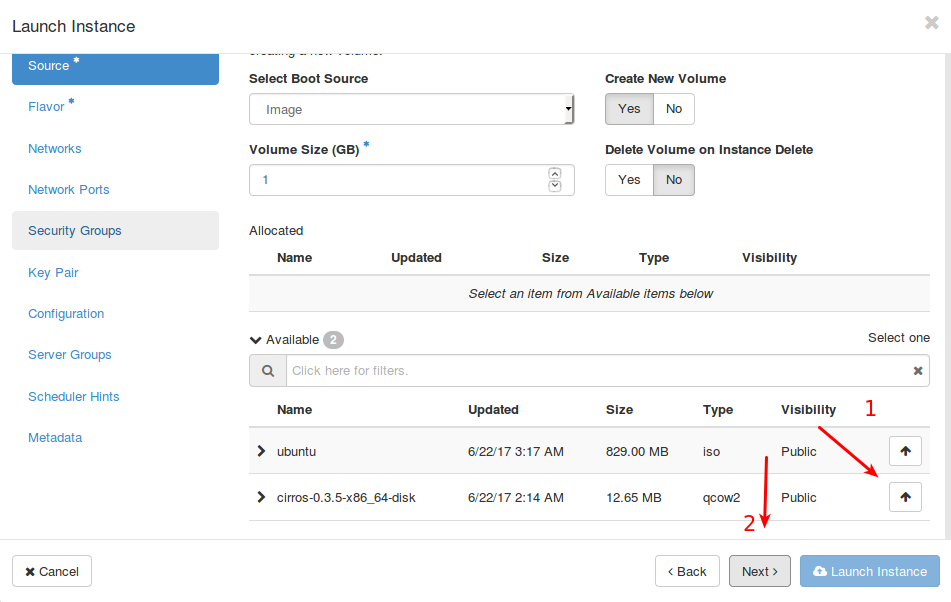
- Click on the icon where the first arrow is pointing, so that we can use “Cirros” to launch our virtual machine.
- After the image is selected, just click “Next” so that we can move to “Flavor” tab.
Flavor Tab
Flavor tab will allow you to allocate resource to your instance. Like:
- Ram.
- CPU.
- Disk Space.
It is similar to giving virtual resources to the virtual machine, but OpenStack gives fancy names to everything. 🙂

You can see that there are 11 available pre-configured templates to choose from. The one I choose gave following resources to the instance:
- 1 virtual CPU.
- 512 MB Ram.
- 1 GB Disk.
You can choose any template from the available 11, depending upon the resources available on your host machine (On which OpenStack is installed).
After flavor is selected, just press “Next”.
Network Tab
Network tab allows us to define a network for our virtual machine, you might have remembered that we’ve created a network above for this purpose. Now by default, the network you have created above will be selected for this machine, as seen in the image below:
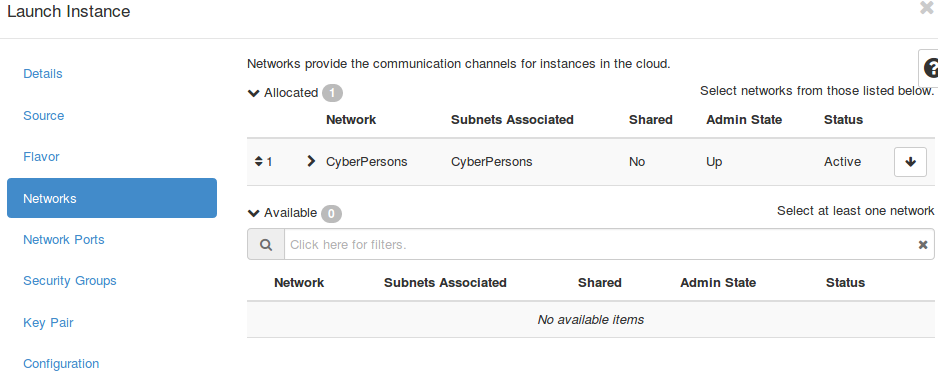
Don’t change anything just click “Next”.
Network Ports Tab
For now, just leave the default settings on “Network Ports” tab and click next.
Security Groups Tab
Security groups define how a specific virtual machine is allowed to talk with the outer world. As for now, we are just trying to create our first virtual machine, you can leave all the defaults. In a later article, we will see that how we can define “Security Groups” depending upon our requirements.
Key-Pair Tab
Leave defaults and click Next.
Configuration Tab
Leave defaults and click Next.
Server Groups Tab
Leave defaults and click Next.
Scheduler Hints Tab
Leave defaults and click Next.
Metadata Tab
Leave defaults and click Next.
Launch Instance
After going through all the tabs, you are now ready to press that magic “Launch Instance” button, you must be wondering that for some tabs we’ve left them with default settings. Its fine for now, because we are just launching our test machine at this time. Later we will go into depth of each tab and see why it is important and why it is not.
Once you click “Launch Instance” button, OpenStack will start creating our virtual machine, and it is going to look something like this:

Step 5: Access Virtual Machine Console!
Once you click “Launch Instance” it will take OpenStack few seconds to create your virtual machine. Once ready you can access the console to see how the command line of your first virtual machine looks like.

Click on “Console” and OpenStack will take you to the console of the virtual machine. The console will look something like this:
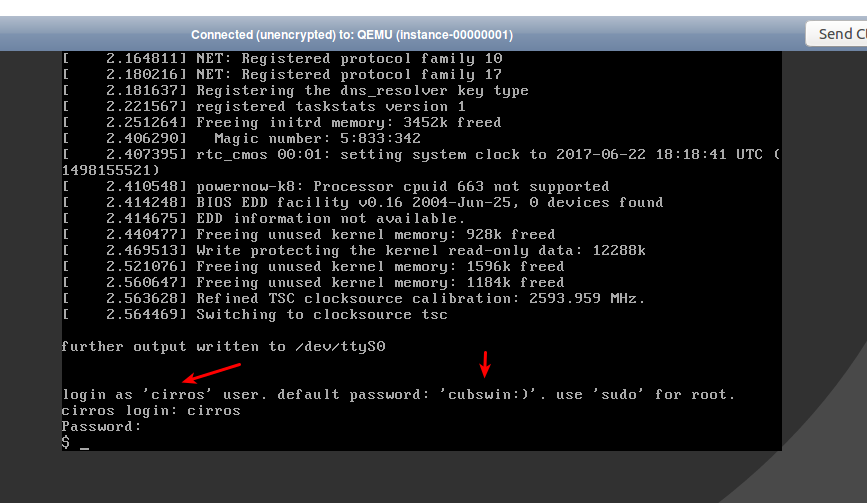
This is simple command line, you can use following details to log in:
Username: cirros
Password: cubswin:)
Congratulations, you have successfully created your first virtual machine/instance on OpenStack.
Conclusion
In this article, we’ve gone through the process of installing OpenStack and creating a very basic virtual machine just to learn that how things work with OpenStack. In our next articles, we will further dig deep into each component of OpenStack and see how each component work.
If you have any question or problem feel free to ask in the comment box below.
Great post!!! Its really useful information
[…] How to install OpenStack and Create your First Virtual Machine/Instance! […]
I think you need to add host ip address to the local.conf flle.