Use Burp Proxy to Intercept HTTP Traffic!
Burp proxy is a very nice tool to intercept HTTP traffic, it normally comes pre-installed with kali linux. In this article we will see how we can use burp proxy on Ubuntu and intercept GET and POST requests. I’am writing this separate article for burp proxy because some of its features are promising like stopping the web requests on fly from their GUI panel. You can also modify HTTP GET or post arguments. That’s is why its considered very useful tool in penetration testing.
We will start with the installation and move further towards intercepting HTTP traffic, so let see how we can use burp proxy to intercept HTTP traffic.
Step 1: Download and run
I am going to do this on Ubuntu Desktop 16.04, so that you don’t have to separately install kali linux. It will work perfectly fine.
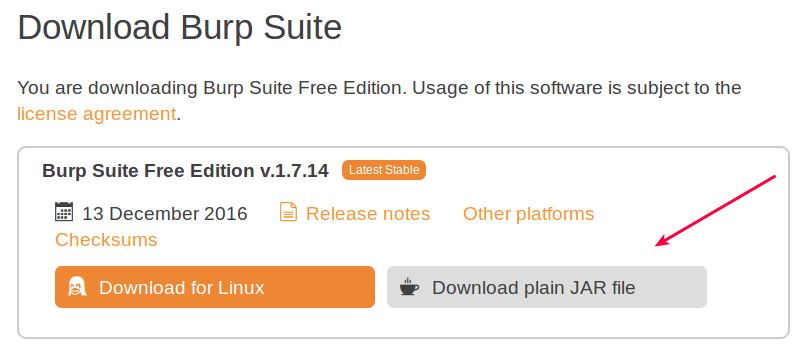
First thing you need to do is download a JAR file from their site, download link is : https://portswigger.net/burp/freedownload
Download the jar file as mentioned in the image below :
Once downloaded you need to change your directory to the folder you downloaded the JAR file to and execute the command below to launch burp proxy GUI panel.
java -jar -Xmx1024m file.jar
file.jar here refers to the jar file you just downloaded in the step above. After the successful launch this window will appear:

In the free version of burp you can not create disk projects, so just click next with the default selection. Next window will let you load your old burp proxy configurations, but since it might be your first burp usage you won’t have any previous configurations.
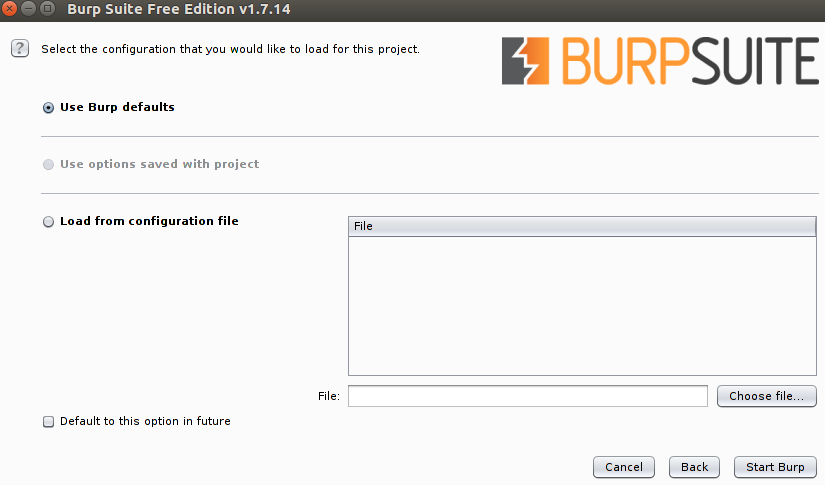
Leave all settings as it is, and click ‘Start Burp’, and you have successfully launched burp proxy.
Step 2: Setup Browser to pass traffic through Proxy!
Before intercepting traffic you need to point your browser to proxy server. First you need to check which port and IP burp proxy is set to listen on. By default its :
- IP: 127.0.0.1
- Port : 8080
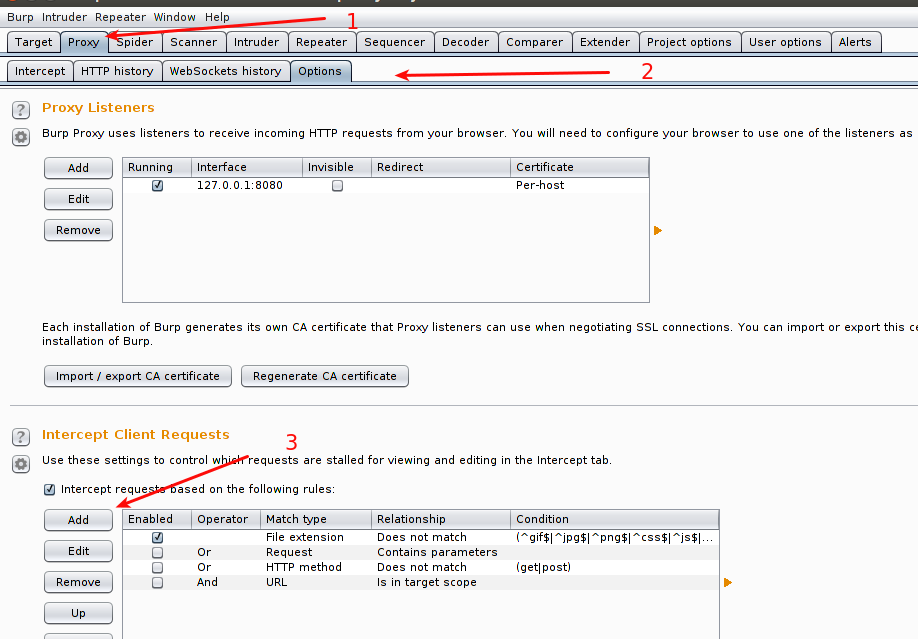
You can confirm from : Proxy -> Options (As in the screen capture below)

- First click the ‘Proxy’ tab so that you can see all settings of the proxy tab.
- Second click the Options tab.
Inside options tab you see that your current proxy listener is set to : 127.0.0.1 and its port is: 8080. So we can configure our browser accordingly.
Configure Firefox:
Go inside Firefox preferences and follow the image below :
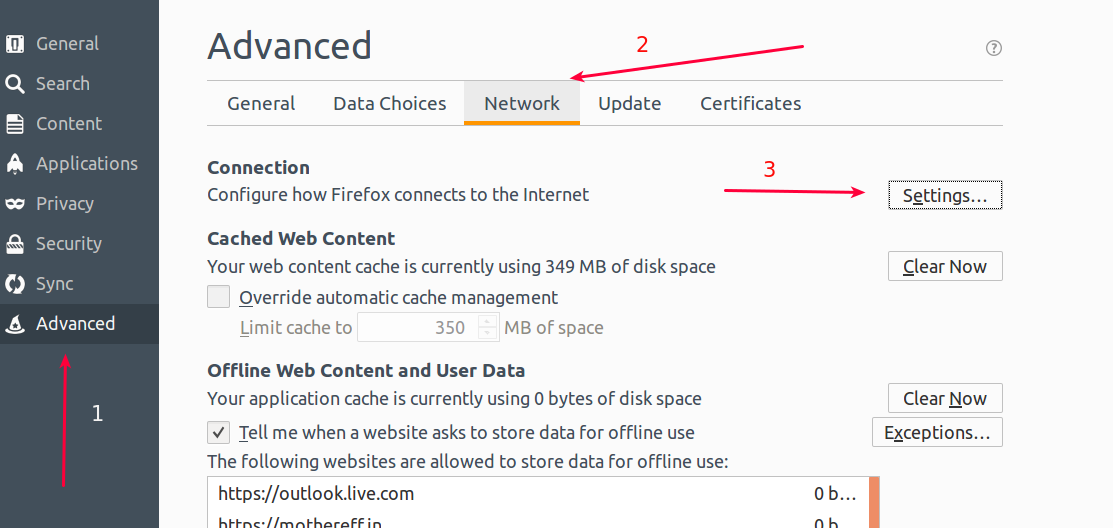
- First click the ‘Advanced’ tab so you can see advance settings.
- Inside there ‘General’ will be selected by default, you need to select Network.
- Finally click ‘Settings’.
This window will pop-up.
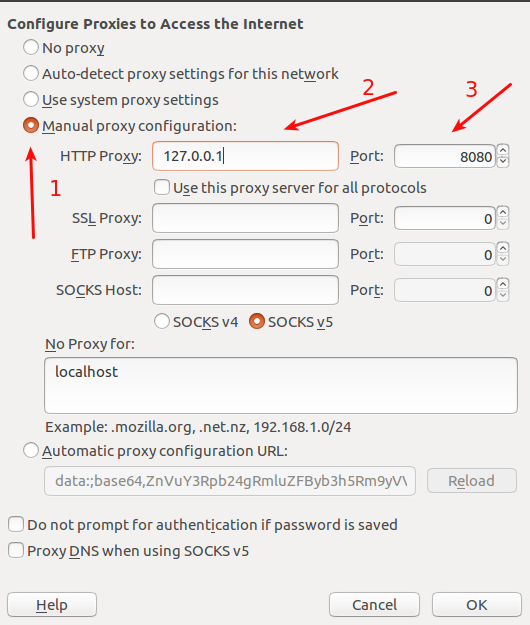
- Click Manual proxy configurations.
- Enter the IP you found inside burp, in my case it was : 127.0.0.1
- Enter your port.
After entering all these details click ‘OK’. You are now good to go, below we will see how we can configure Chrome.
Chrome Settings:
Go to chrome settings page and enter ‘proxy’ in the search box.

Than click ‘Change Proxy Settings’, the window below will appear on the screen :
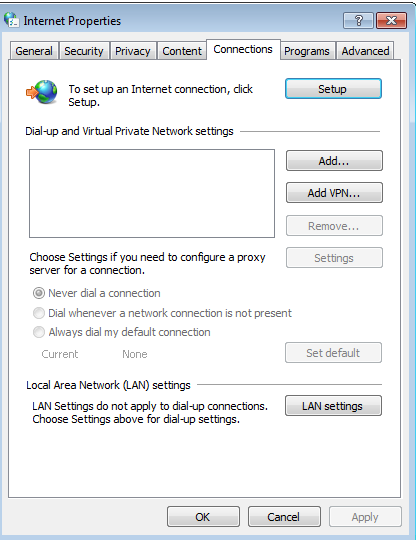
Just click ‘Lan Settings’. On the next window that is going to appear will let you enter your proxy server details.
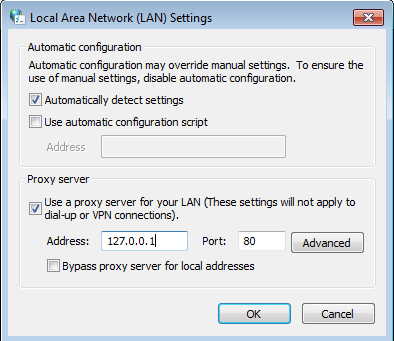
Change the address and port if required and click OK, after that your chrome is successfully set to pass traffic to the proxy server.
Step 3: Basic Intercept
As your browsers are now configured to pass traffic through proxy we are ready to intercept traffic, at this point you might not be able to browse the web, because inside burp ‘Intercept’ is set to ‘ON’, that means any traffic that is passed through need to be manually forwarded, so we should stop that for now. Follow the steps in the screen capture below:
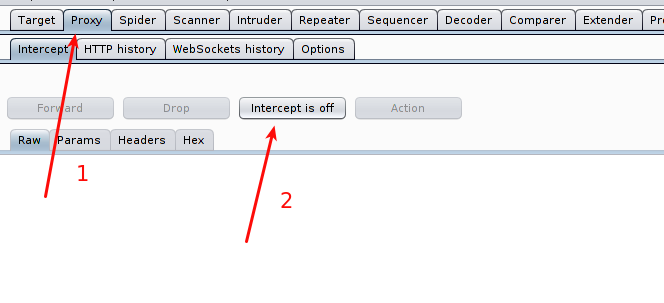
- Click ‘Proxy’ and than ‘Intercept’ inside it.
- As you can see I’ve already turned off the intercept, you can click on that button to turn off on your side.
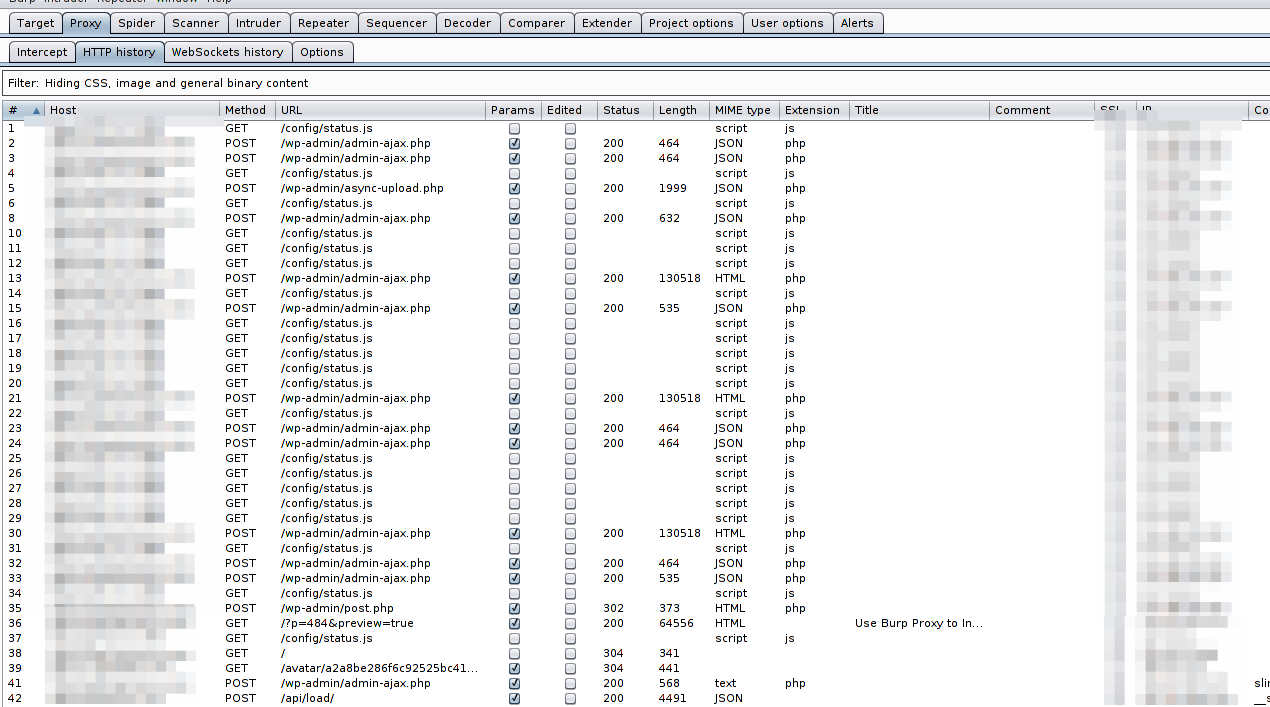
Now you can see all traffic history under the HTTP History tab.
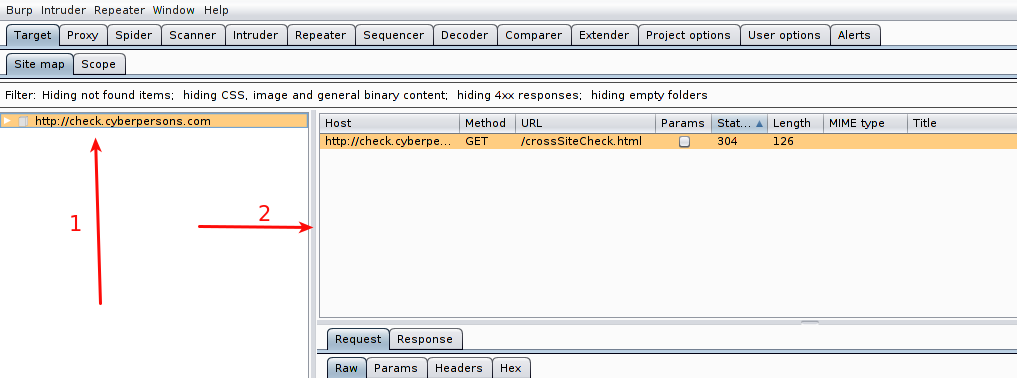
Lets look at a simple example of a GET request intercepted inside burp by visiting : http://check.cyberpersons.com/crossSiteCheck.html
Your intercepted web request inside burp proxy will look like :
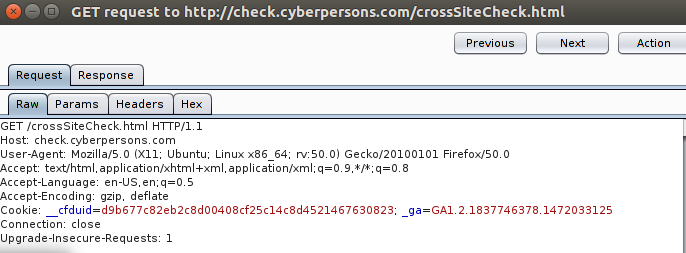
You can see that you have various options there, if you need you can specifically see:
- Headers of the request.
- Response for that particular request.
- Request parameters if any.
And more, but these will be of our interest in this article.
Step 4: Modify GET Parameters on the fly
You can perform a cross site scripting attack only by modifying get parameters on the fly using burp proxy. If a web page uses java script to filter input (client side filtration) supplied by the user than that page is a good candidate.
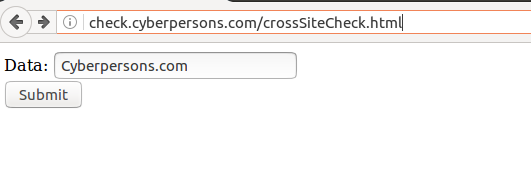
For example you submit a form through a page and it performs input validation through java script, what you can do is fill out the page with normal inputs.
Note: Please make sure your burp proxy intercept is set to ‘ON’ so that you can modify parameters on the fly
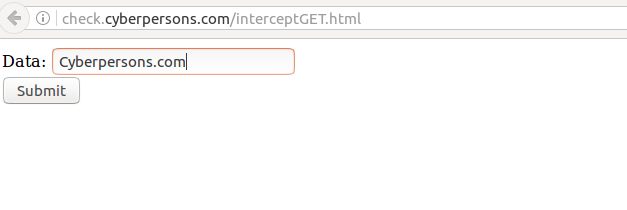
You can see that I’ve filled the input field with normal text ‘Cyberpersons.com’, but once you click submit, burp proxy will pop-up allowing you to either pass or drop this request, and it will look something like this:

As pointed out by the arrow, data argument from the web application contains the value ‘Cyberpersons.com’. At this point web application is already done with its input filtration process, and here you can change this text to something like : <script>alert(‘cyberpersons.com’)</script>
That is what I’ve done.
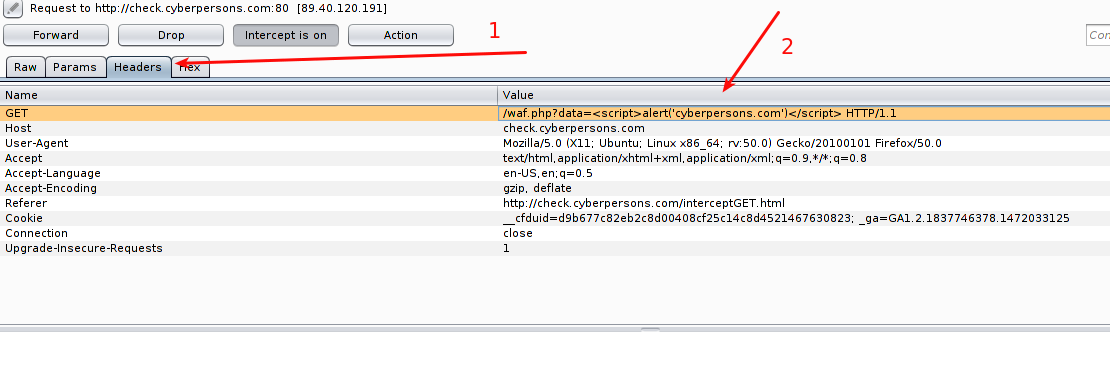
- Click on the Headers tab to modify the headers of this request.
- The second arrow points you towards the place where you need to inject the text I’ve mentioned above.
Once its down your final web request will look like :

As you can see data variable now contains the string we desire, you can now click on the ‘Forward’ button, and response from our web application is:
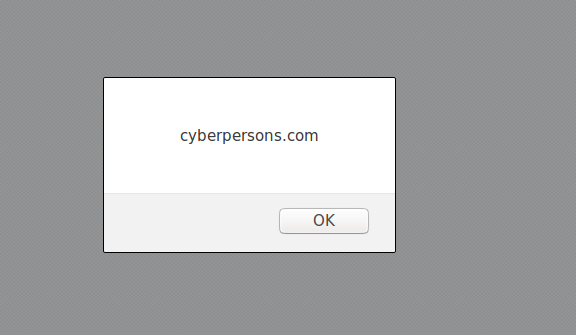
You can see that even the input validation was in place, but you can bypass the validation by modifying the requests on the fly.
Step 5: Modify POST Parameters on the fly
In the same way, you can also modify post parameters on the fly too. Since most of the web applications these days use POST method to submit form data, we will see how we can modify post arguments data through burp proxy. We will again submit the form located at : http://check.cyberpersons.com/crossSiteCheck.html
Once submitted, burp will again pop-up, but this time data will be in the HTTP request body. Since post transmits data inside body of the request.
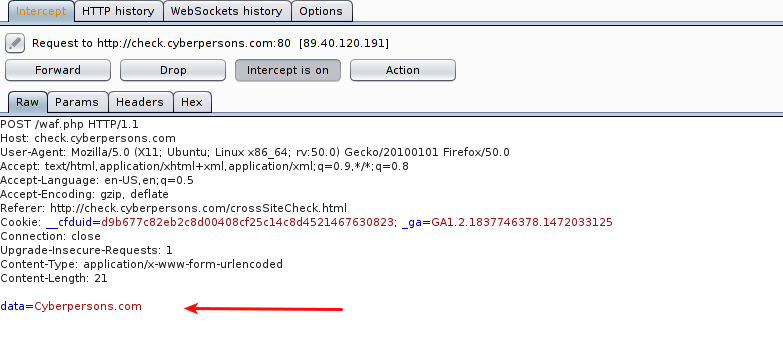
Arrow points towards the data being transmitted inside HTTP request, its time we should modify this request.
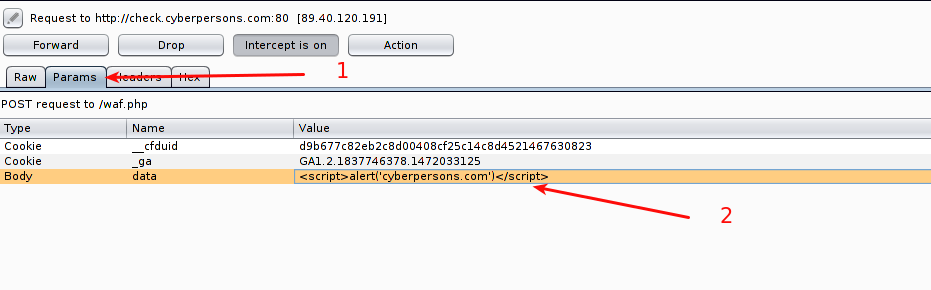
- Click the ‘Params’ tab so that we can modify parameters inside body.
- You can see that below the ‘Params’ tab we’ve three values but we are interested to modify the ‘data’ value only, so you can modify the value as you desire.
You may notice than other than modifying the post parameters value you can also modify cookie values too, it can also be useful in some cases but we won’t touch that discussion today.
After the modification , request will look like :
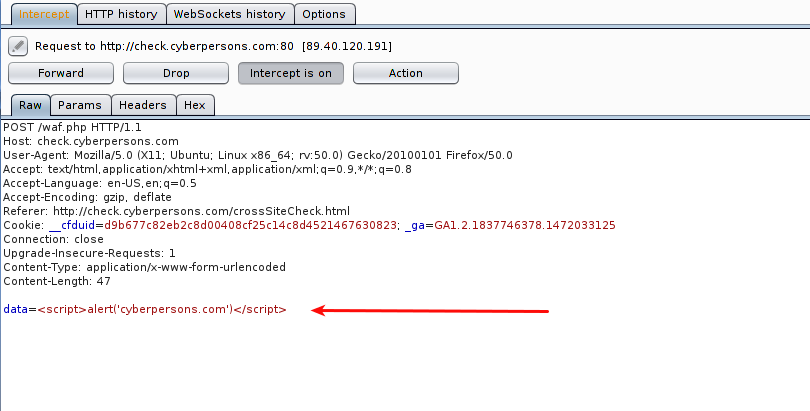
You can see that ‘data’ variable contains the string that we wanted it to contain. Now just click ‘Forward’, and your web application will respond with the response same as in the screen capture below:

This way you can easily bypass filtration using burp proxy.
Step 6: Spider and find Hidden Pages!
You can use burp proxy to find pages that you normally can’t while browsing the site like robot.txt or any other pages not linked from the web site. This can help you identify the test pages usually not removed by developers, these pages are usually an entry point to the back end server. Let see how we can spider a web application using burp proxy.
- Right click on the host, and select ‘Spider This Host’.
- On this box your newly discovered urls will appear.
I’ve the following result on my end:

You can see that browsing only main page of site, we are able to identify two more pages, in real life application you might be able to identify lot of hidden pages like ‘robot.txt’, from which you can infer a lot of information that can help you later.
Step 7: Intercept a specific URL!
If you don’t intercept a specific url, you will find a lot of use less information that you might not need. You can easily intercept only specific urls in burp.
- Select Proxy tab.
- Inside proxy tab select ‘Options’.
- And click ‘Add’
This window will pop-up.

This window gives you a lot of options, you can either block on:
- Domain name.
- IP Address.
- URL.
- HTTP Method.
and more, you can use this window and customize your interception rules as desired.
Conclusion
This article was a basic overview of how you can make effective use of burp proxy to make your penetration testing tasks easier and in some cases more efficient as well. As we discussed that we can easily bypass weak filtration, and if the filtration is only done on client side than that application is the best candidate. From this article we can conclude that both client side plus server side filtration is important as well.
Also make sure you don’t have any underdevelopment pages laying around on your server. If you have any questions feel free to ask in the comment section below.