cPanel Alternative: VestCP! Complete guide on how to install and use vesta cp
Recently I’ve stumbled upon a very beautiful control panel while installing it for a client, by beautifull, I mean its actually is really beautifully designed and very easy to use as well. Control panel name is VestCP its a grest alternative to cPanel (cPanel costs $15/month for a VPS), since most of the VestCP features are free to use, you can look at their site here.
Features that comes with Vesta CP
- Apache
- Nginx
- Mail Server
- Pre installed firewall and fail2ban
- FTP
- DNS
You can easily install all these features with just one command, today we will see how we can install Vesta CP on a fresh Cent OS installation and use it to host a website.
Step 1: Install Vesta CP
It would be recommended to install Vesta CP on fresh centos installation (Centos 6.x 64 bits). You can install Vesta CP on various modes.
- nginx + apache
- nginx + php-fpm
- apache
I would recommend to install with nginx + apache, to install nginx + apache run the following commands.
curl -O http://vestacp.com/pub/vst-install.sh
Run the following as a single command
bash vst-install.sh --nginx yes --apache yes --phpfpm no --vsftpd yes --proftpd no --exim yes --dovecot yes --spamassassin yes --clamav yes --named yes --iptables yes --fail2ban yes --mysql yes --postgresql no --remi yes --quota no --hostname cyberpersons.cyberperons.com --email [email protected] --password cyberpersons
Now sit back and relax, it will take 10-15 minutes for Vesta CP to be installed on your virtual machine or dedicated server.
Once installed, you can access your installation at : https://<ip address of your server>:8083/login/
Username : admin
Password : cyberpersons
Step 2: Register Private Name servers
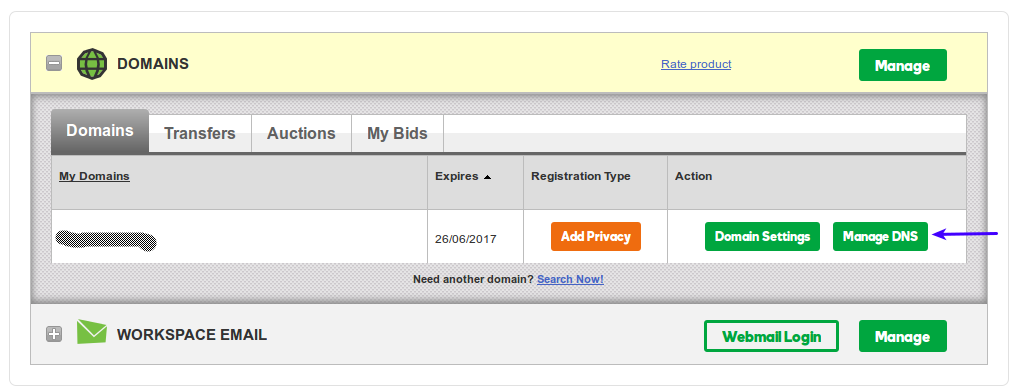
Now you will need to register private name servers, so that you can point your domain(s) towards your Vesta CP server. Registering private name servers is almost the same for most registrars, since I’ve a domain at Godaddy I will demonstrate through Godaddy. Login to your Godaddy control panel and click manage dns
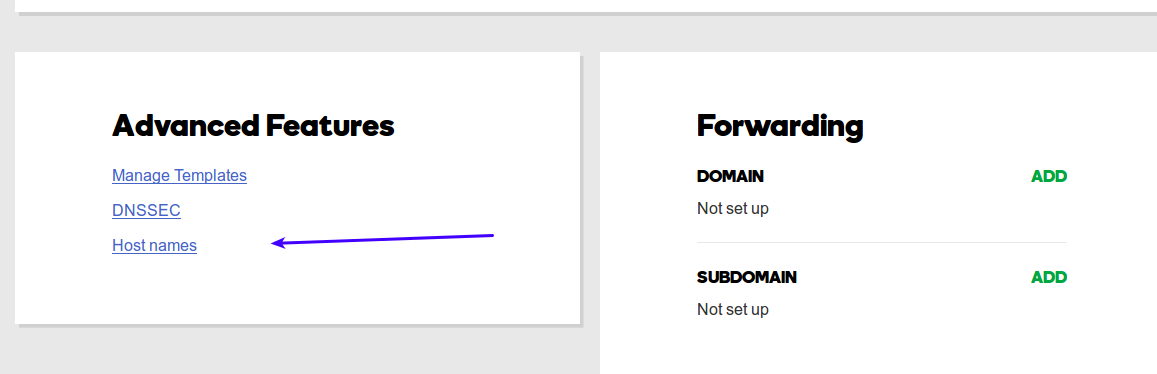
 Scroll down and click ‘Host Names’
Click ‘Add’, and fill the two boxes.
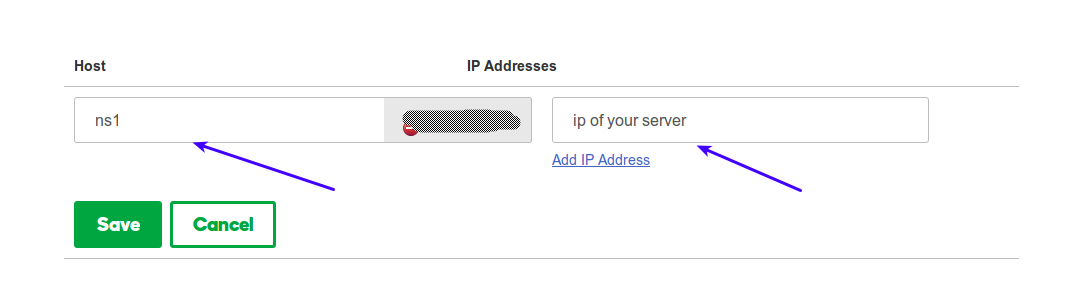
Once you click ‘Save’ ns1.yourdomain.com is registered, similarly you can register ns2.yourdomain.com.
After registering name servers, go back to previous menu and set dns.
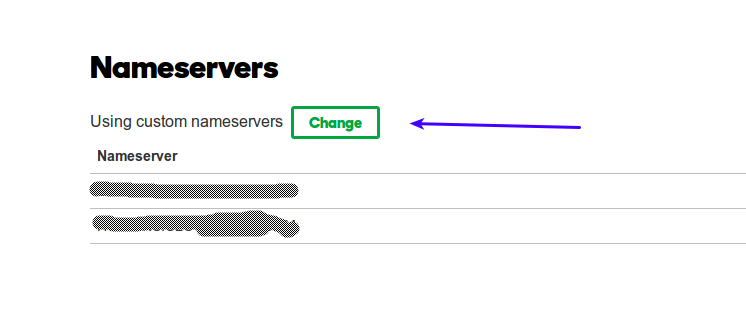
Set following name servers:
- ns1.yourdomain.com
- ns2.yourdomain.com
Step 3: Add domain to Vesta CP
Go back to your Vesta CP at : https://<ip address of your server>:8083/login/
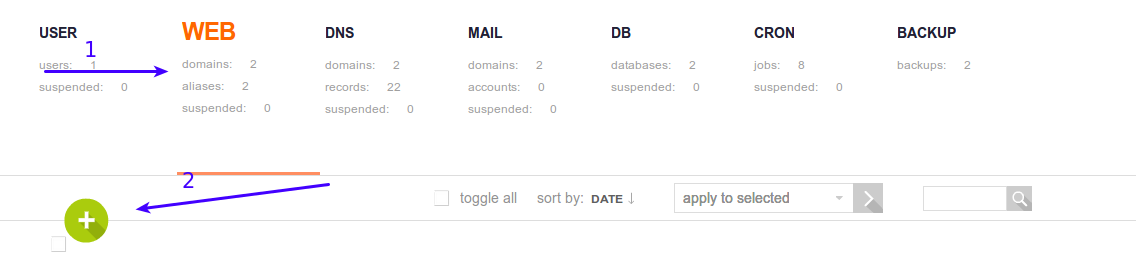
First click Web, and then click the Plus sign as mentioned in the above image.
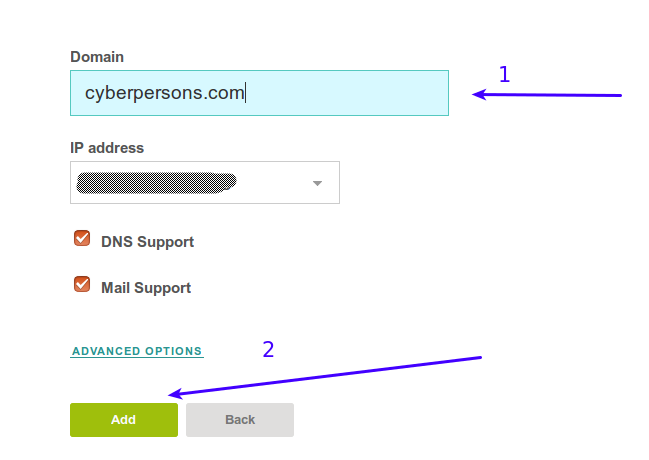
Enter your domain, and if you have multiple IP addresses on your server you can choose them from drop down as well. And then click ‘Add’, your domain is now successfully added.
Step 4 : Configure DNS on Vesta CP
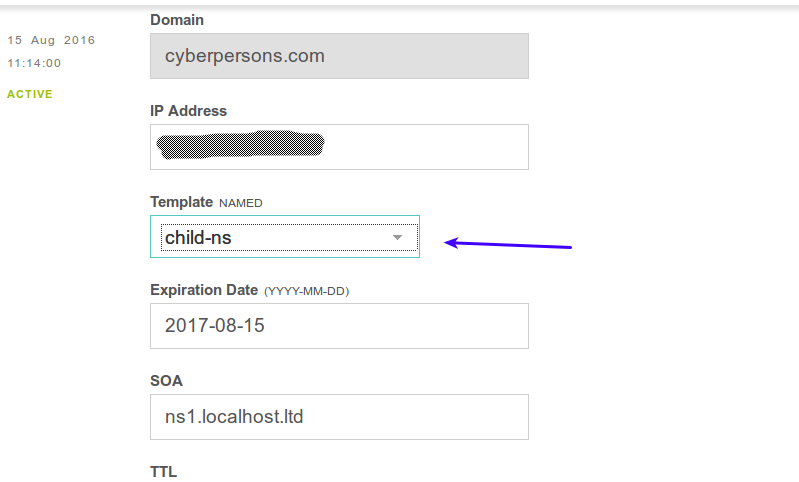
On the Vesta CP menu click DNS.

Once you hover the mouse on the specified region you will see the menu appear above your domain, click ‘Edit’ from the menu. From that menu you have to change the template to ‘Child NS’, and click ‘Save’.
Finally you have to set your package default DNS, so other domains can use the same name servers.
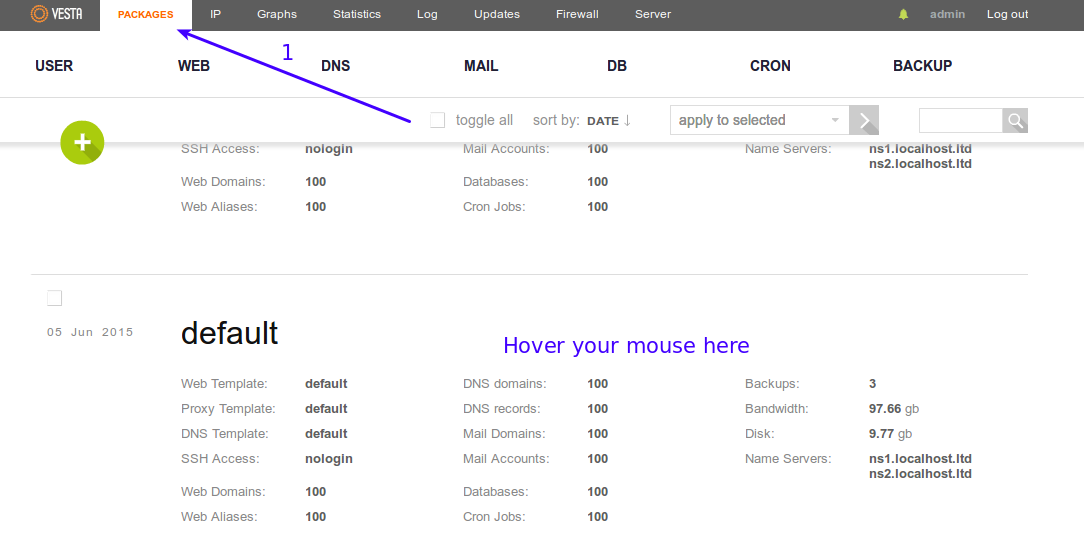
Click packages on the Top menu, and scroll down to edit the default package, hover the mouse over the default packages so that Edit menu can appear, and then click Edit.
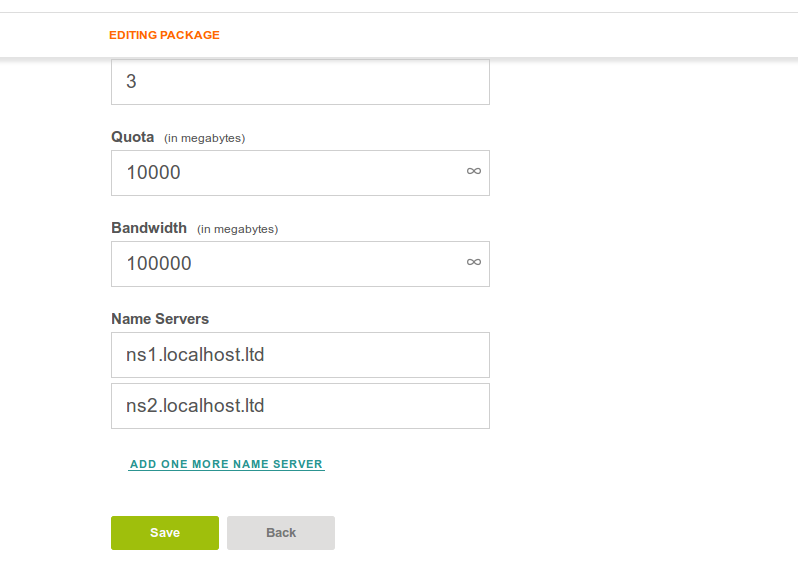
In the first name servers Box put : ns1.yourdomain.com, and in the second box put : ns1.yourdomain.com
You successfully added domain and set name servers, you can now view your domain at : www.yourdomain.com (Please allow 24-48 hours for your name servers propagation).
Step 5: Configure FTP
Since you have just added domain to Vesta CP definitely you will want to upload some files as well, Vesta CP gui based file manager cost $3/month, but we can use FTP to upload data and its free of cost.
Again you have to click ‘Web’ so that you can add ftp account to your domain.
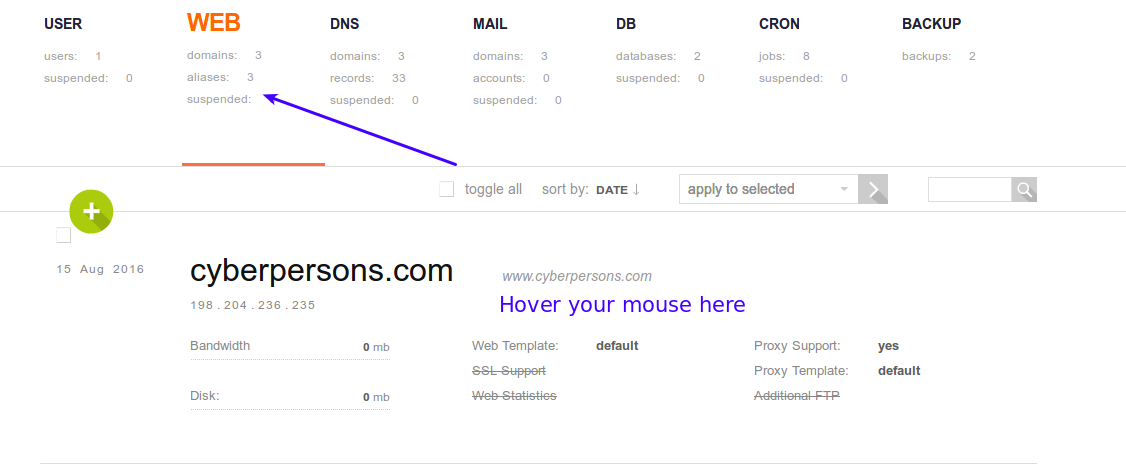
Hover your mouse over the specified region so that you can get the menu, click ‘Edit’. Scroll down and check ‘Additional FTP‘ box.
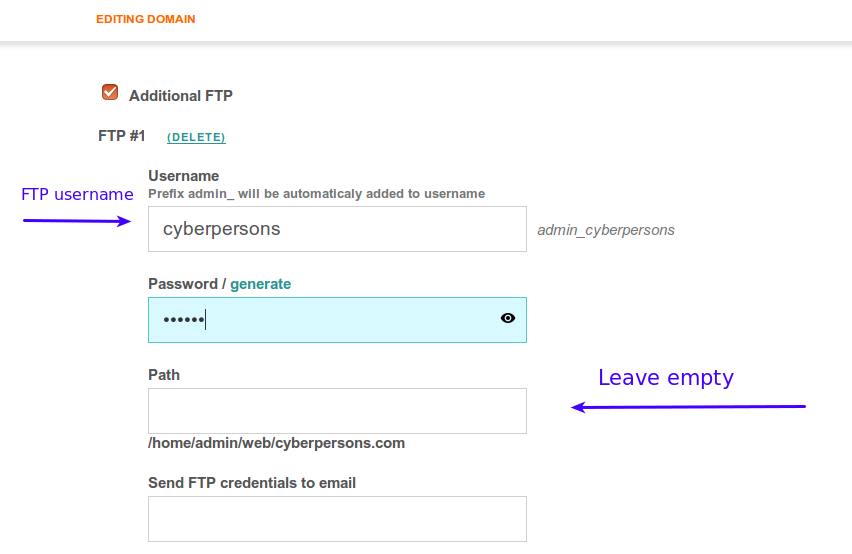
Leave the path box empty, and click ‘Save’, you can now use following details to upload data to your website:
- Host name or IP : ip address of your server
- FTP User name : admin_cyberpersons
- Password : Password that you have entered
You can use FileZilla client to upload data to your website.
Step 6: (Optional) Create Database
Some web applications need database as well, you can easily create database in VestaCP through their gui panel.
Login to Vesta CP at : https://<your server ip address>:8083
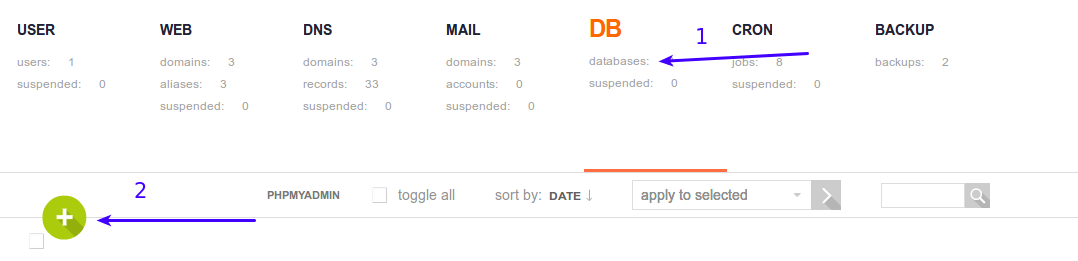
Click DB on the top menu and then click the Plus sign. Fill the details as described below and click ‘Add’:
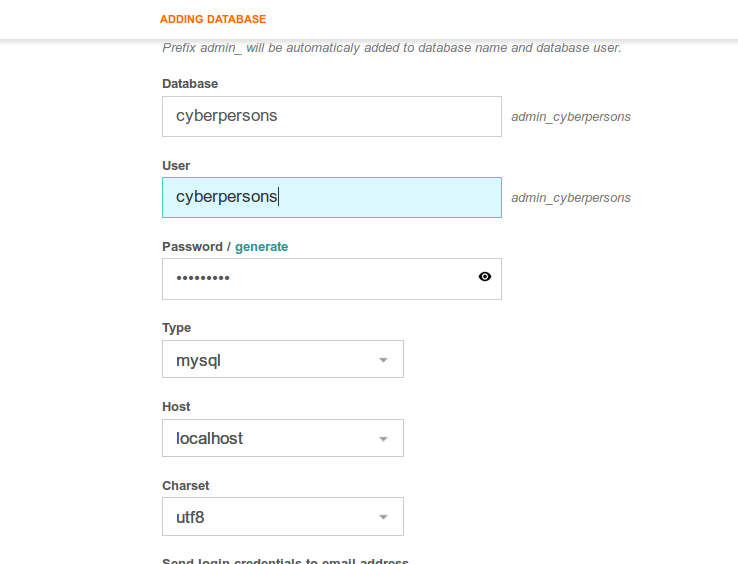
Your web application can use following details to connect to database:
- Database : admin_cyberpersons
- User : admin_cyberpersons
- Password : The one that you have specified
- Host : localhost
That all to run a basic website on VestaCP, I will write in my future article about how you can enable temporary urls for the newly added domains (for which the dns is not yet propagated). If you have any questions feel free to ask in the comments section.
[…] cPanel Alternative: VestCP! Complete guide on how to install and use vesta cp […]