How to register private name servers with Namecheap or Godaddy!
Registering private name servers is not really a hard job, but sometimes it can become hectic or confusing. There can be two possible reasons for registering private name servers. First that you have recently moved from shared/reseller hosting service to vps or dedicated server. When you was on shared/reseller hosting you don’t need private name servers, because name servers was provided to you by your web hosting company, and all you had to do was update them at your domain registrar, but with VPS or dedicated server you will have to create your own name servers.
What is name servers and how DNS works?
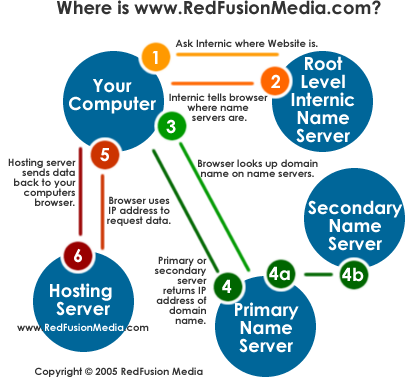
Computers don’t understand these beautiful domain names, they understand IP addresses. Domains are created for humans, so that they can easily remember them. However still all these domains are hosted on some server with IP address. DNS server is nothing but a database, which keep records that which domain is hosted on which IP address, record can be of type:
domain name -> IP Address
Anyone can query this server to get IP address of the domain they are interested in. Now when you was with your shared/reseller hosting provider they had a name server and it contains records for your domain. With VPS or dedicated server you are on your own, you need to create your own dns server or you can use cloudflare, you can read the following cloudflare guide to set it up:
How to setup cloudflare for your domain!
Let us discuss one use case where you need to register private name servers.
Read about: Shared Hosting Vs WordPress Hosting – Which Would Be Good for You?
Usecase: VPS (Virtual Private Server)
First of all congratulation on moving to virtual private server. Now you need at least one domain to register private name servers. That domain will than be used by all other domains as their nameserver. If you have installed cPanel/WHM , they already ship with dns server, all you need to do is tell your domain registrar that your dns server can be found at this ip (IP of your cPanel/WHM server).
And rest will be managed by cPanel/WHM, you can just continue with creating accounts. Well let see how to register private name servers with namecheap or godaddy.
Namecheap
First, we will continue with namecheap.
Step 1: Login to Namecheap Control Panel!
The first step is to log into the namecheap control panel, once you are logged in, your control panel will look something like this:
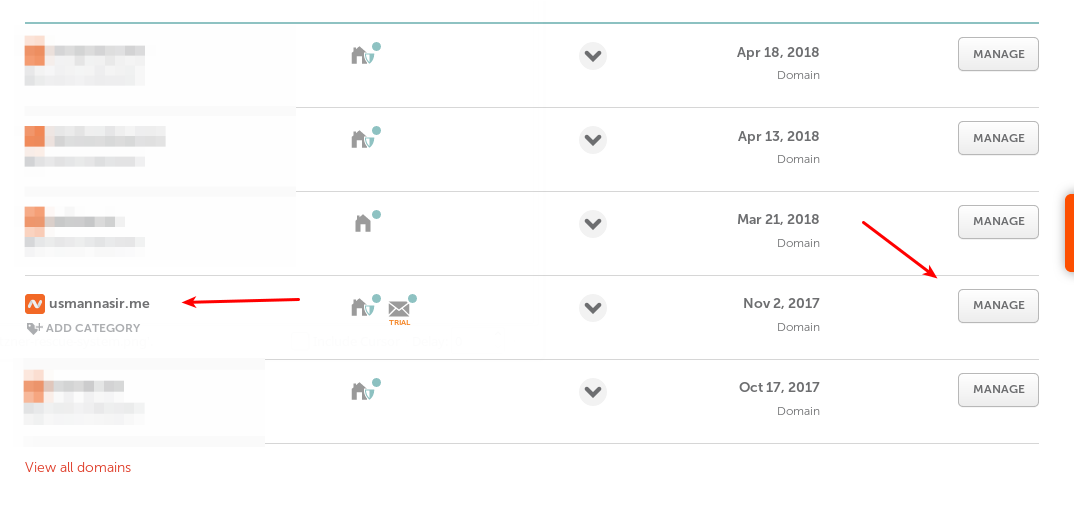
The blurred part is the list of domains in your namecheap account. Now select the domain which you want to use as nameserver. Than click “Manage” in front of that domain name.
Step 2: Advance DNS
Once you click “Manage”, you will be displed with alot of options related to that domain, and it will look something like this:

Click “Advance DNS” , so that we can start registereing private name servers.
Step 3: Register Private Name servers!
On this menu you can easily create privaten name servers.
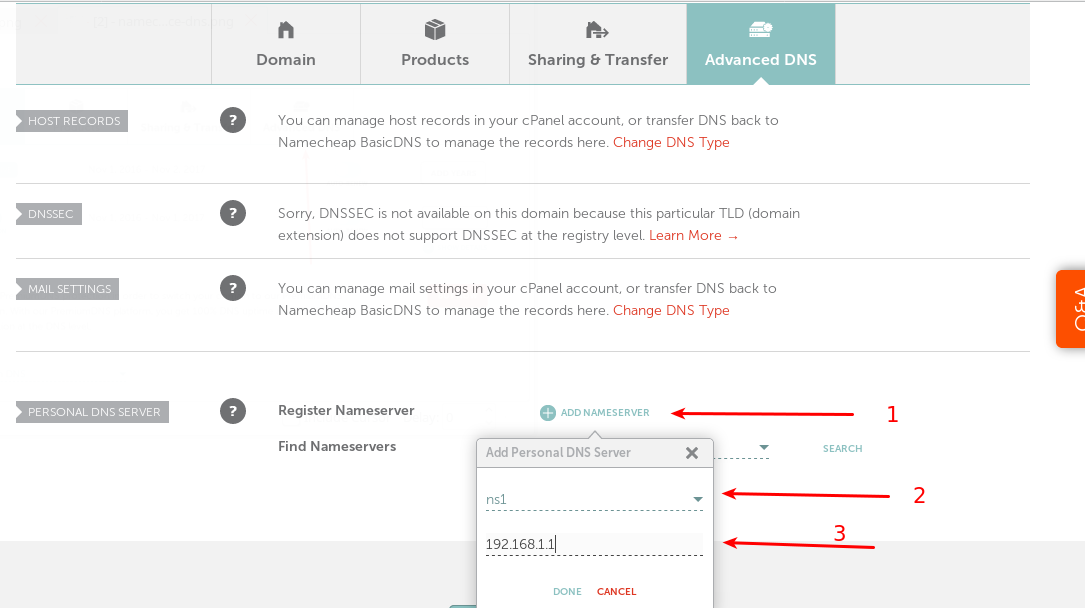
Now they call it “Personal DNS Server”, you can replace personal with private. 🙂
- Click “Add Nameserver”.
- From the drop-down, you can select many options like “ns1”, “ns2” and more.
- On the third option is IP address of your cPanel server, please carefully enter this IP.
Once done with all three steps, click “Done”.
For now you have registered only one nameserver which is “ns1.yourdomain.com”, in this case the domain selection was “usmannasir.me”, so nameserver that got registered is “ns1.usmannasir.me”.
Similarly repeat these three steps to register “ns2.yourdomain.com”.
And you are done, you have successfully registered private name servers.
Godaddy
Let see that how we can do the same with Godaddy. Procedure with most of the domain registrar is almost same, but they have only used different terminologies, which makes it difficult for people to understand.
Step 1: Log in to Godaddy Control Panel!
The first step is to log into godaddy control panel and locate DNS settings for your domain:
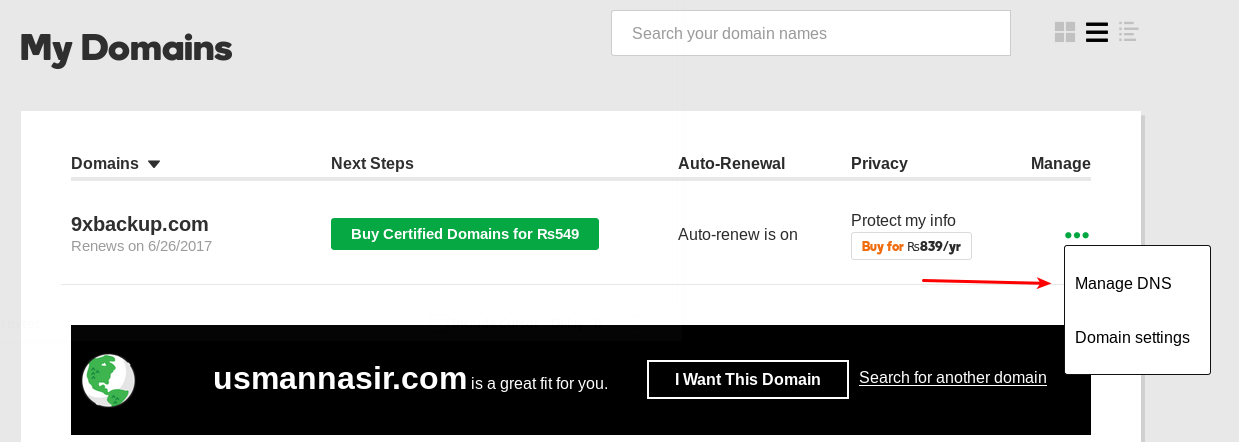
Click “Manage DNS” to open domain dns settings.
Step 2: Godaddy Advance DNS Settings!
Once in the dns settings page, you have to scroll down to the end to look for Adavance dns settings:

Under “Advanced Features” click “Host names”.
Step 3: Register Private Name servers
Once you click the “Host names” in the last step the process is now similar to the namecheap, something like this will open:
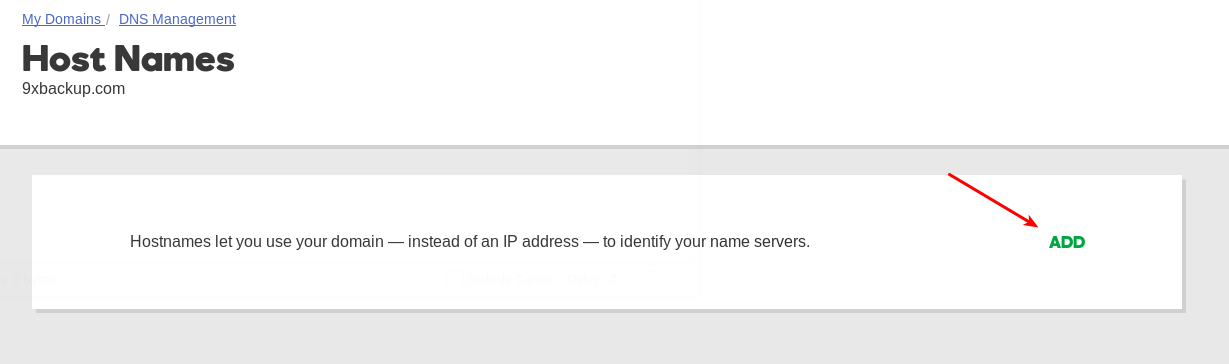
Click “Add” to register name servers.
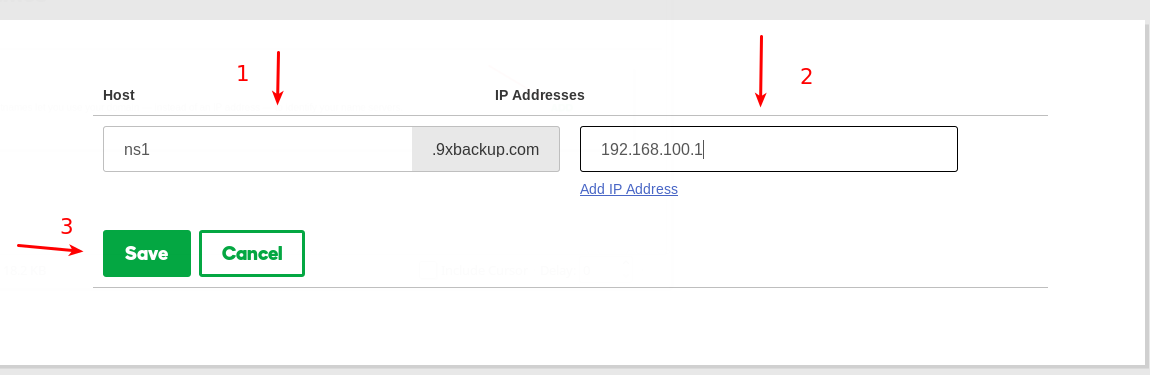
- Namecheap gave you the drop down list to choose the name, however in godaddy you can simply add anything you like, I’ve added “ns1”, which is normally an industry standard.
- Similarly on second step you will have to enter the IP of your cPanel/WHM server or where ever your DNS is hosted.
- Finally, click save.
This has only registered “ns1.yourdomain.com”, you will have to repeat these three steps to register “ns2.yourdomain.com”.
Once both name servers are registered you can now configure your DNS settings on WHM so that your dns server can start working.
Configure DNS on WHM
Now that you have done registereing name servers on your domain registrar either NameCheap or Godaddy, you have to add some DNS records in WHM as well. This step is indepedant of the Godaddy or Namecheap setup, and it must be performed in order for your dns server to work properly.
You have to log into your WHM, and open “Basic WebHost Manager Setup” window.
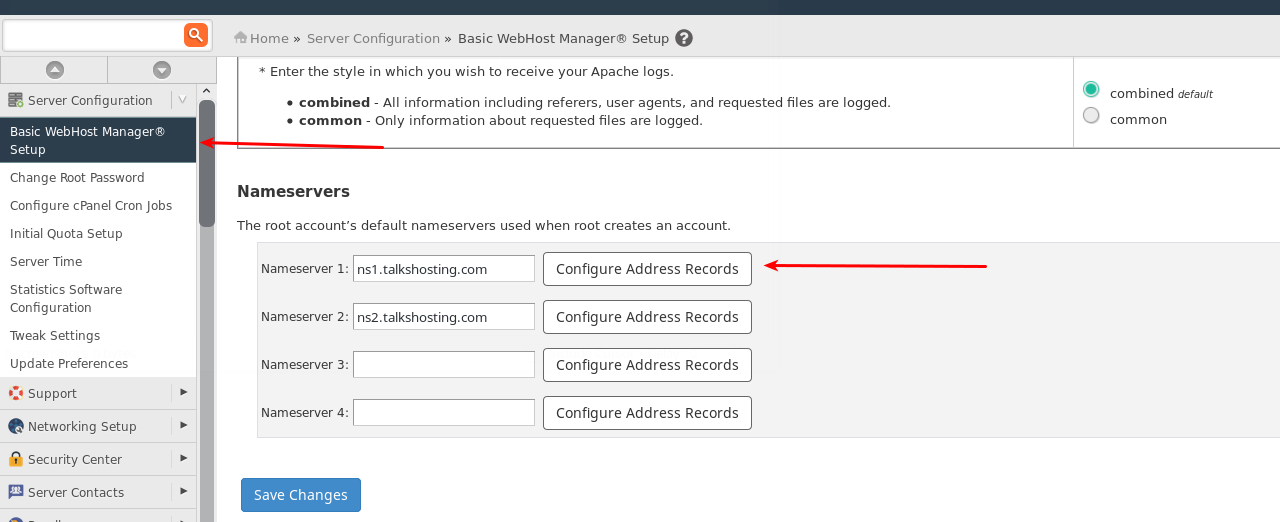
Here Nameserver1 is ns1.talkshosting.com because our DNS server is identified by this hostname.
Now the name servers that you have registered above should be entered here first, and than you have to click “Configure Address Records”.
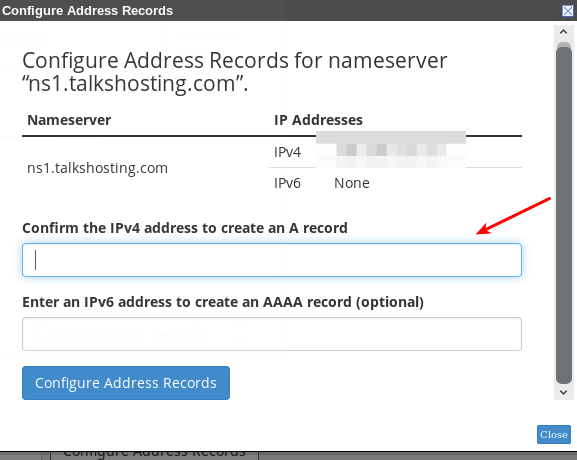
In the box enter the IP, this IP should match with the IP you have entered at your domain registrar. After adding the appropriate IP click “Configure Address Records”, and rest will be managed by WHM.
You can leave the IPv6 box empty.
Now do the same with second record as well, and click “Save Changes”.
Conclusion
After doing everything mentioned above you can now use your own name servers that you have registered i.e.:
ns1.yourdomain.com
ns2.yourdomain.com
With any of your domain hosting in your VPS or dedicated server, however if your domain is not hosted in this server you can not use this name servers.
If you are ready to go through all this frustration, than you are good to move away from shared/reseller hosting enviroment. You can also read some of our other important articles if you are just starting with your VPS, to make best use of your first purchase:
How to install and Configure cPanel/WHM!
How to install and configure ModSecurity on cPanel/WHM!
How to install missing PHP Extensions in cPanel/WHM
Automatically backup all cPanel/WHM Accounts to remote SFTP server!
If you have any questions, feel free to ask them in a comment box below. 🙂